Mango avocado shrimp lettuce wraps

Published On - May 4, 2023

By Amy TesconiAmy Tesconi

The sun is shining and it’s time to take the party outside. In honor of long evenings, long weekends and unforgettable days with friends, we’ve launched our first limited release Sauvignon Blanc. This crisp, inviting wine is a refreshing start to the summer months. It’s also the perfect match for succulent shrimp, savory avocado and the fresh, late-spring flavors of mango, jalapeno and cilantro. Whip it up for guests or enjoy with a good book on a warm evening. 
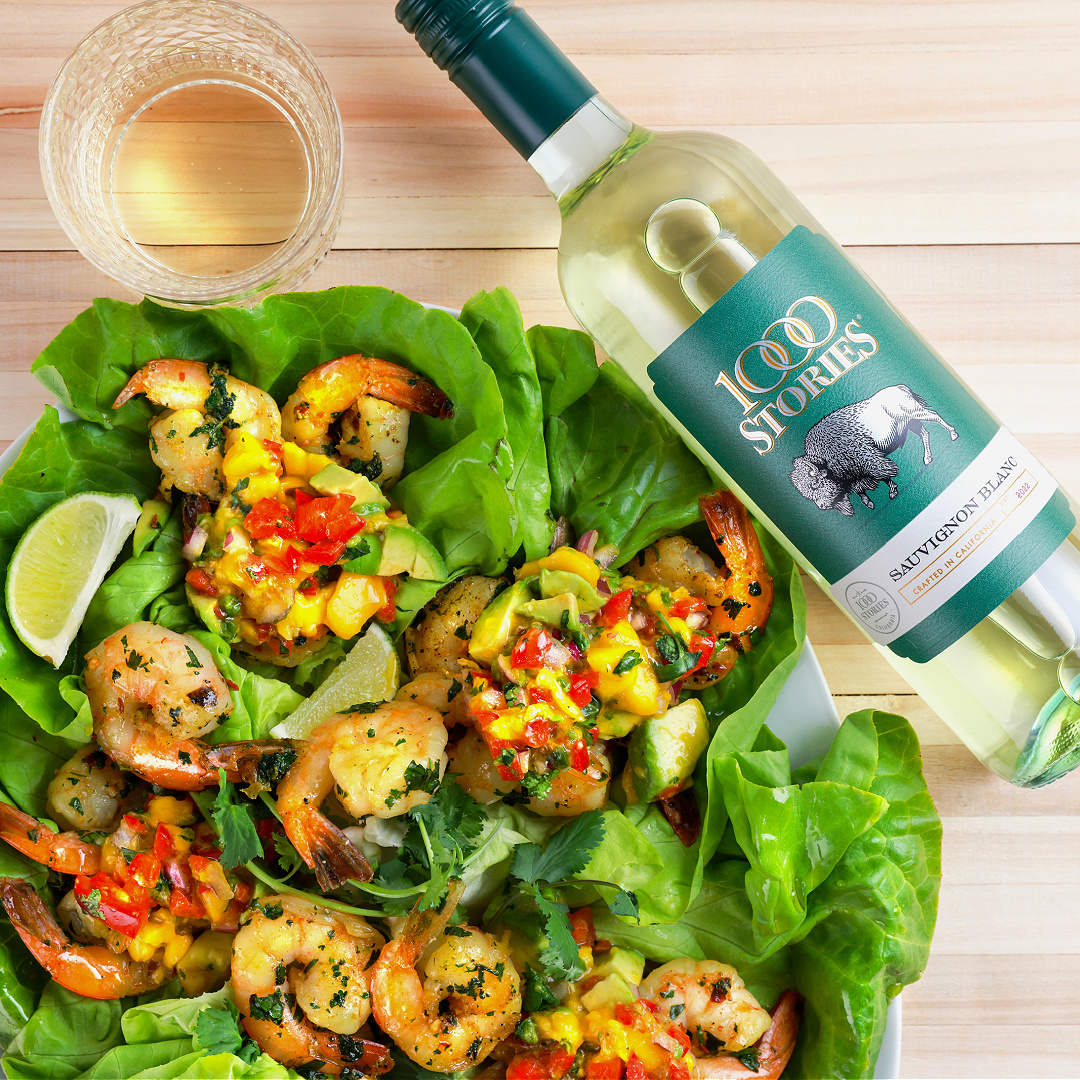
Mango Avocado Salsa Shrimp Lettuce Wraps 

Serves 4

Ingredients:

2 heads Boston or butter lettuce (leaves pulled apart)

For the mango salsa:

2 mango, diced

2 avocado, diced

½ cup red onion, diced

½ cup red bell pepper, finely chopped

1 jalapeno, finely diced

1/3 cup cilantro, finely chopped

1/4 cup mint Leaves, finely chopped

2 limes, juiced

Salt to taste

For the shrimp: 

2 tablespoons avocado or olive oil

½ cup cilantro, finely chopped

½ teaspoon cumin

¼ teaspoon red pepper flakes

¼ teaspoon sea salt

1 lb shrimp (peeled, deveined, tails removed)

Lime wedges

Directions:

Combine shrimp, olive oil, cilantro, cumin, red pepper flakes and salt in large bowl, and stir to mix. Let stand 20-30 minutes, or refrigerate 2-3 hours if time allows.

In a bowl, mix together the mango, avocado, red onion, bell pepper, jalapeno, cilantro, mint, lime juice, and salt to taste. 

Warm a pan over medium heat and add the shrimp. Cook on each side for two to three minutes or until pink and cooked through. Add a squeeze of lime to finish. 

To assemble, add the mango avocado salsa and shrimp to the lettuce leaves. Serve with a lime wedge. Enjoy!

Recipe Notes:

Leftovers: Refrigerate in an airtight container for up to three days.

Serving Size: One serving is approximately two wraps.

More Additions: Add minced garlic, shredded cabbage, sriracha, and/or cheese.

7 Tips for the perfect charcuterie board

Published On - April 5, 2023

By Kyra MitchellKyra Mitchell

creating the perfect charcuterie board

Snack boards, also known as charcuterie boards or cheese boards, are a popular and easy way to serve food at parties or impromptu gatherings. These versatile boards allow satisfying snacking for all food preferences and dietary needs – and they are fun to make.

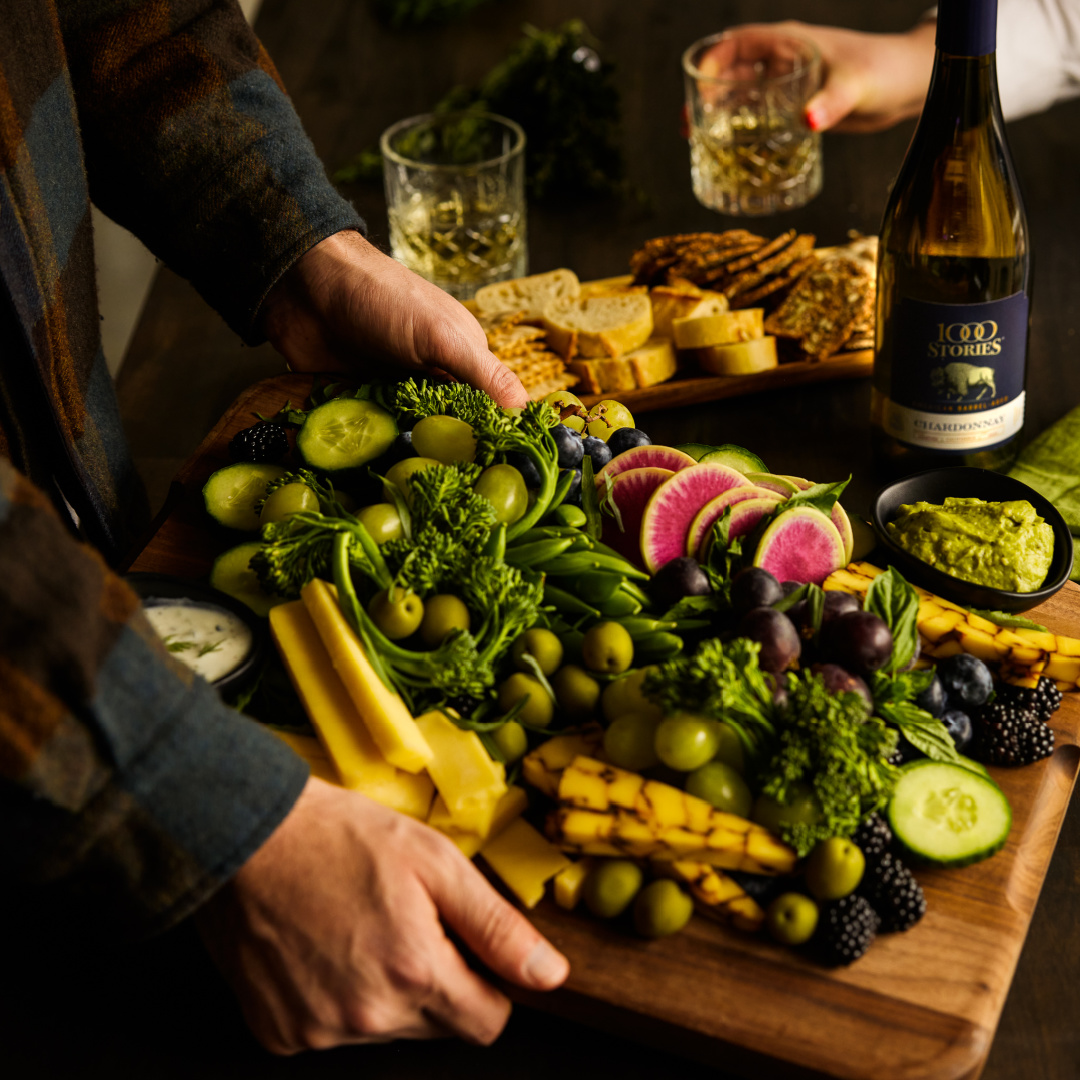
Vegetarian Charcuterie Board featuring American Barrel Aged Chardonnay, crackers, olives, assorted cheeses, berries, broccolini, and radishes for color pops.


Your snack board can be carefully curated or made on the fly – there really aren’t any rules! But if you are new to hosting,

here are a few tips for snack board success:

  1. Choose the right board – The size and shape of your board or platter will depend on the number of people you’re serving and the amount of food you want to include. You can also branch out and use more than one if needed.
  2. Variety is key – Choose meats and cheeses with a variety of flavors, colors and textures. Throw in olives, pickles, fruit (fresh or dried), crackers, bread, nuts, veggies, chips and dips. If you are working on a tight timeline and don’t have time to shop, you may be surprised by the snacks you already have.
  3. Cut meats, cheeses and bread – Cut larger items into small pieces that are easy to eat and perfect for a single person to just grab one piece (or more).
  4. Arrange – This is the fun part. Depending on what you are serving, there are many ways to arrange the board and don’t be afraid to add some height. Height will make the board more visually appealing. If this seems challenging, try looking up examples of styled boards online or on social!
  5. Add utensils where needed – A cheese that needs to be spread or cut will need a cheese knife, dips may need a spoon, and fruits or vegetables that are hard to grab may need toothpicks or a fork.
  6. Serve with wine – The casual dining approach of a snack board pairs perfectly with a versatile wine that can complement many foods and scenarios. We recommend our American Barrel Aged Chardonnay or Pinot Noir
  7. Don’t be afraid to experiment. There are no rules when it comes to making charcuterie boards. So experiment with different combinations of meats, cheeses, and other items.

Philly Cheese Steak Slider

Published On - January 31, 2023

By Amy TesconiAmy Tesconi

It’s Winter! The season of cabins, cold hikes and enjoying snowy days on the slopes while they last. It’s also the best time for warm comfort foods at the end of an adventurous day.

That’s where this recipe comes in – Philly cheese steak sliders. These delicious sandwiches are just what you need at the end of an active day – or any time you want to indulge in something delicious. We recommend pairing with our Zinfandel. Zinfandel is a bold and versatile wine that stands up well to steak and loves a good cheese pairing – in this case, a generous helping of melted provolone!

Philly Cheese Steak Sliders

Makes 4 

Ingredients:

  • 2 teaspoons olive oil
  • 1 medium onion, sliced
  • 1 medium red bell pepper, sliced
  • 8 ounces sliced mushrooms
  • 1 tablespoon fresh oregano, finely chopped (or 1 tsp. dried oregano leaves)
  • Sea salt (or Himalayan salt) and ground black pepper (to taste; optional)
  • 12 ounces raw lean beef sirloin, sliced very thin
  • ¼ cup sliced banana or cherry peppers (optional)
  • 4 thinly sliced pieces of provolone cheese
  • 4 small slider rolls, split and toasted

Directions:

1. Heat oil in large nonstick skillet (or griddle) over medium-high heat.

2. Add onion and bell pepper; cook, stirring frequently, for 3 to 5 minutes, or until onions are

soft. Add mushrooms and oregano. Season with salt and pepper if desired; cook, stirring

frequently, for 3 to 5 minutes, or until mushrooms are soft.

3. Add sirloin; cook, stirring frequently, for 3 to 4 minutes, or until beef is cooked through. Top

evenly with banana peppers (if desired) and cheese. Remove from heat; cover and let stand

for 1 to 2 minutes, or until cheese is melted.

4. Top buns evenly with meat mixture; serve immediately.

Recipe Notes:

Leftovers: Refrigerate steak and veggie mixture in an airtight container for up to three days.

Dairy-Free: Use vegan cheese instead of provolone cheese or omit completely.

Vegetarian: Double the mushrooms and omit the steak.

Grilled Rosemary & Red Wine Pork Tenderloin

Published On - November 28, 2022

By Amy TesconiAmy Tesconi

Traditionally, turkey and ham get all the holiday attention, but following those rules just isn’t our style. Especially when there are so many great pork recipes out there.

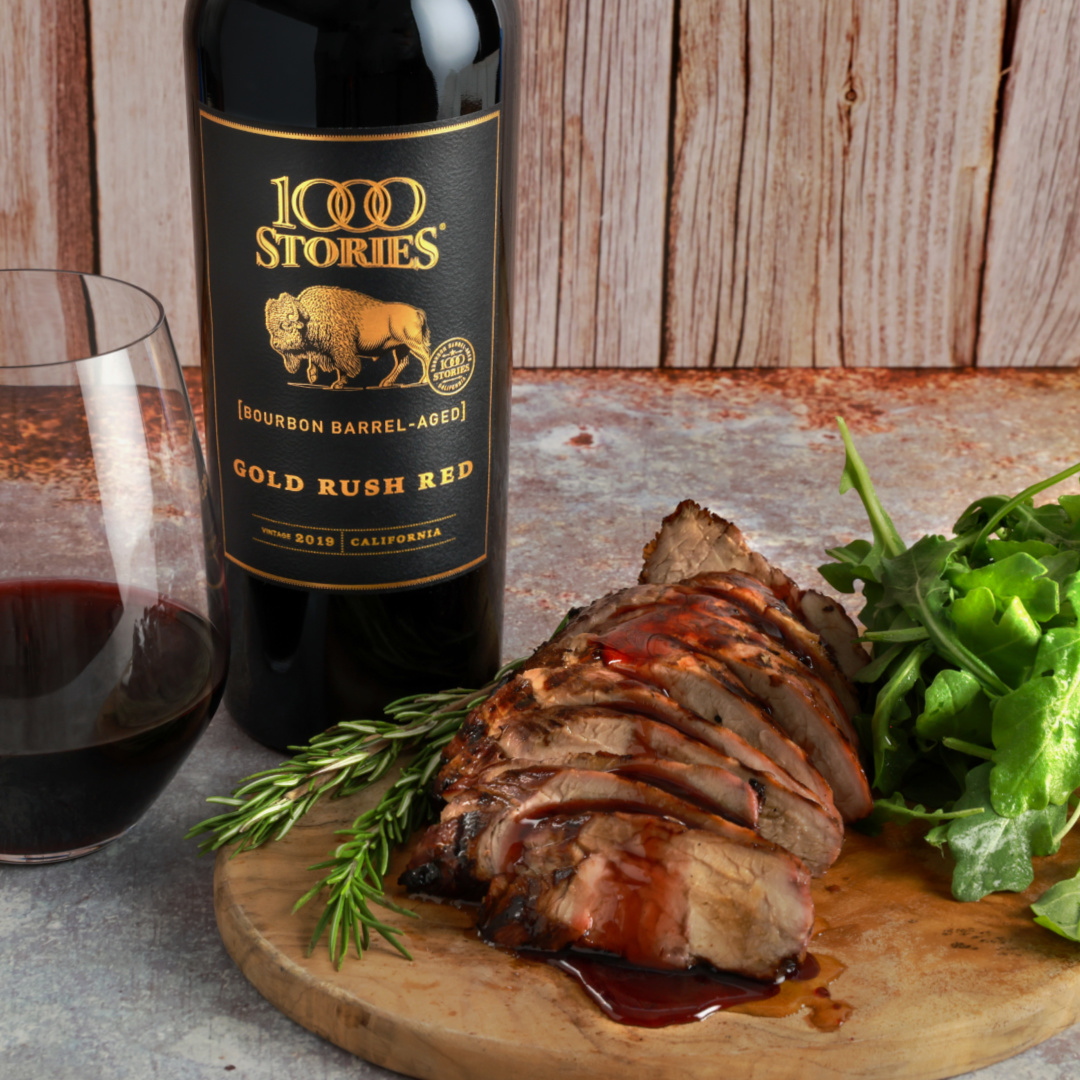
Pork is great for pairing with wines that have a bold fruit profile, like our Bourbon Barrel Aged Gold Rush Red.  The sweet, smokey flavor of pork in this recipe welcomes the wine without overwhelming it.  The two make such a great match that we decided not only to pair the wine, but to use it in the recipe to make a delicious rosemary wine sauce which we drizzled over the top.

Make this as a main dish at your next dinner party – or go all out and host the family this year for something different. Enjoy!

Grilled Rosemary & Red Wine Pork Tenderloin

Serves 6

Ingredients:

  • 2 pork tenderloins, about 1 lb. each
  • 1 cup dry red wine
  • 1 (2 inch) sprig fresh rosemary
  • 1 clove garlic, smashed
  • Salt/pepper
  • 1/4 cup red-wine vinegar
  • 1 tablespoon mild-flavored honey
  • 1/4 teaspoon finely chopped fresh rosemary
  • 1 teaspoon extra-virgin olive oil
  • 2 cups baby arugula

Directions

  1. Boil wine, rosemary sprig and garlic in a small heavy saucepan until reduced to about 1/2 cup, 7 to 8 minutes. Pour through a fine sieve into a measuring cup, then transfer rosemary sprig and garlic to a sealable plastic bag along with 1/4 cup wine marinade and tenderloins. Marinate, chilled, turning bag occasionally, at least 2 hours or overnight.
  2. Return remaining 1/4 cup wine marinade to saucepan and add vinegar, honey, and chopped rosemary, then boil dressing until reduced to about 1/4 cup, about 10 minutes and thicker.
  3. Prepare grill for cooking. When fire is medium-hot. Pat pork dry and season with salt and pepper. Grill on lightly oiled grill rack over medium-hot fire, turning frequently, until an instant-read thermometer inserted diagonally 2 inches into meat registers 155 degrees F, about 20 minutes. Transfer to a cutting board, then tent loosely with foil and let stand 10 minutes before slicing.
  4. Once the pork tenderloin is sliced, drizzle rosemary/wine sauce over pork tenderloin and serve on a platter with baby arugula tossed with olive oil.

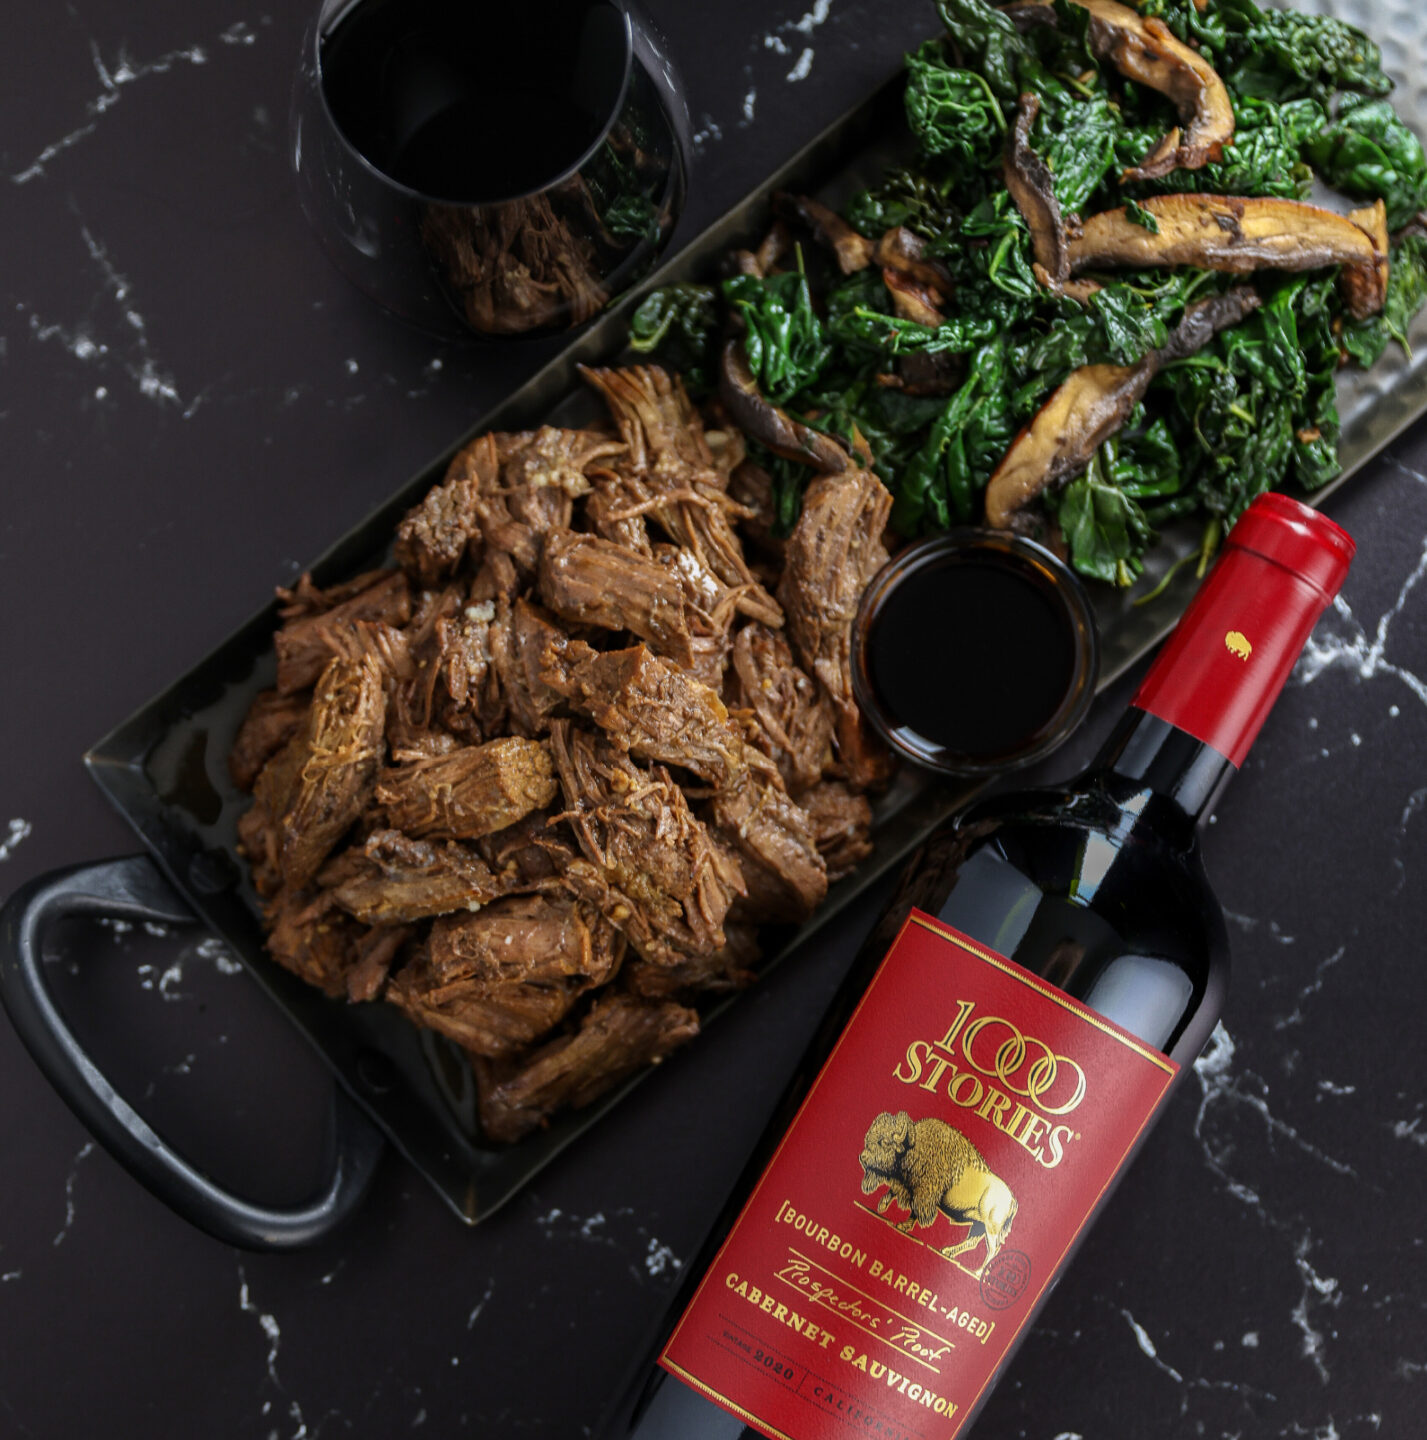
Slow Cooker Balsamic Roast Beef

Published On - November 15, 2022

By Amy TesconiAmy Tesconi

The weather is changing and the days just got shorter. This time of year we are relentless about
getting out and soaking up every minute of daylight. We are also craving warm comfort foods at
the end of an active day. Our recipe for balsamic roast beef lets you have both: warm, tender
roast beef with little effort or time, so you can spend your extra time sneaking in a hike or
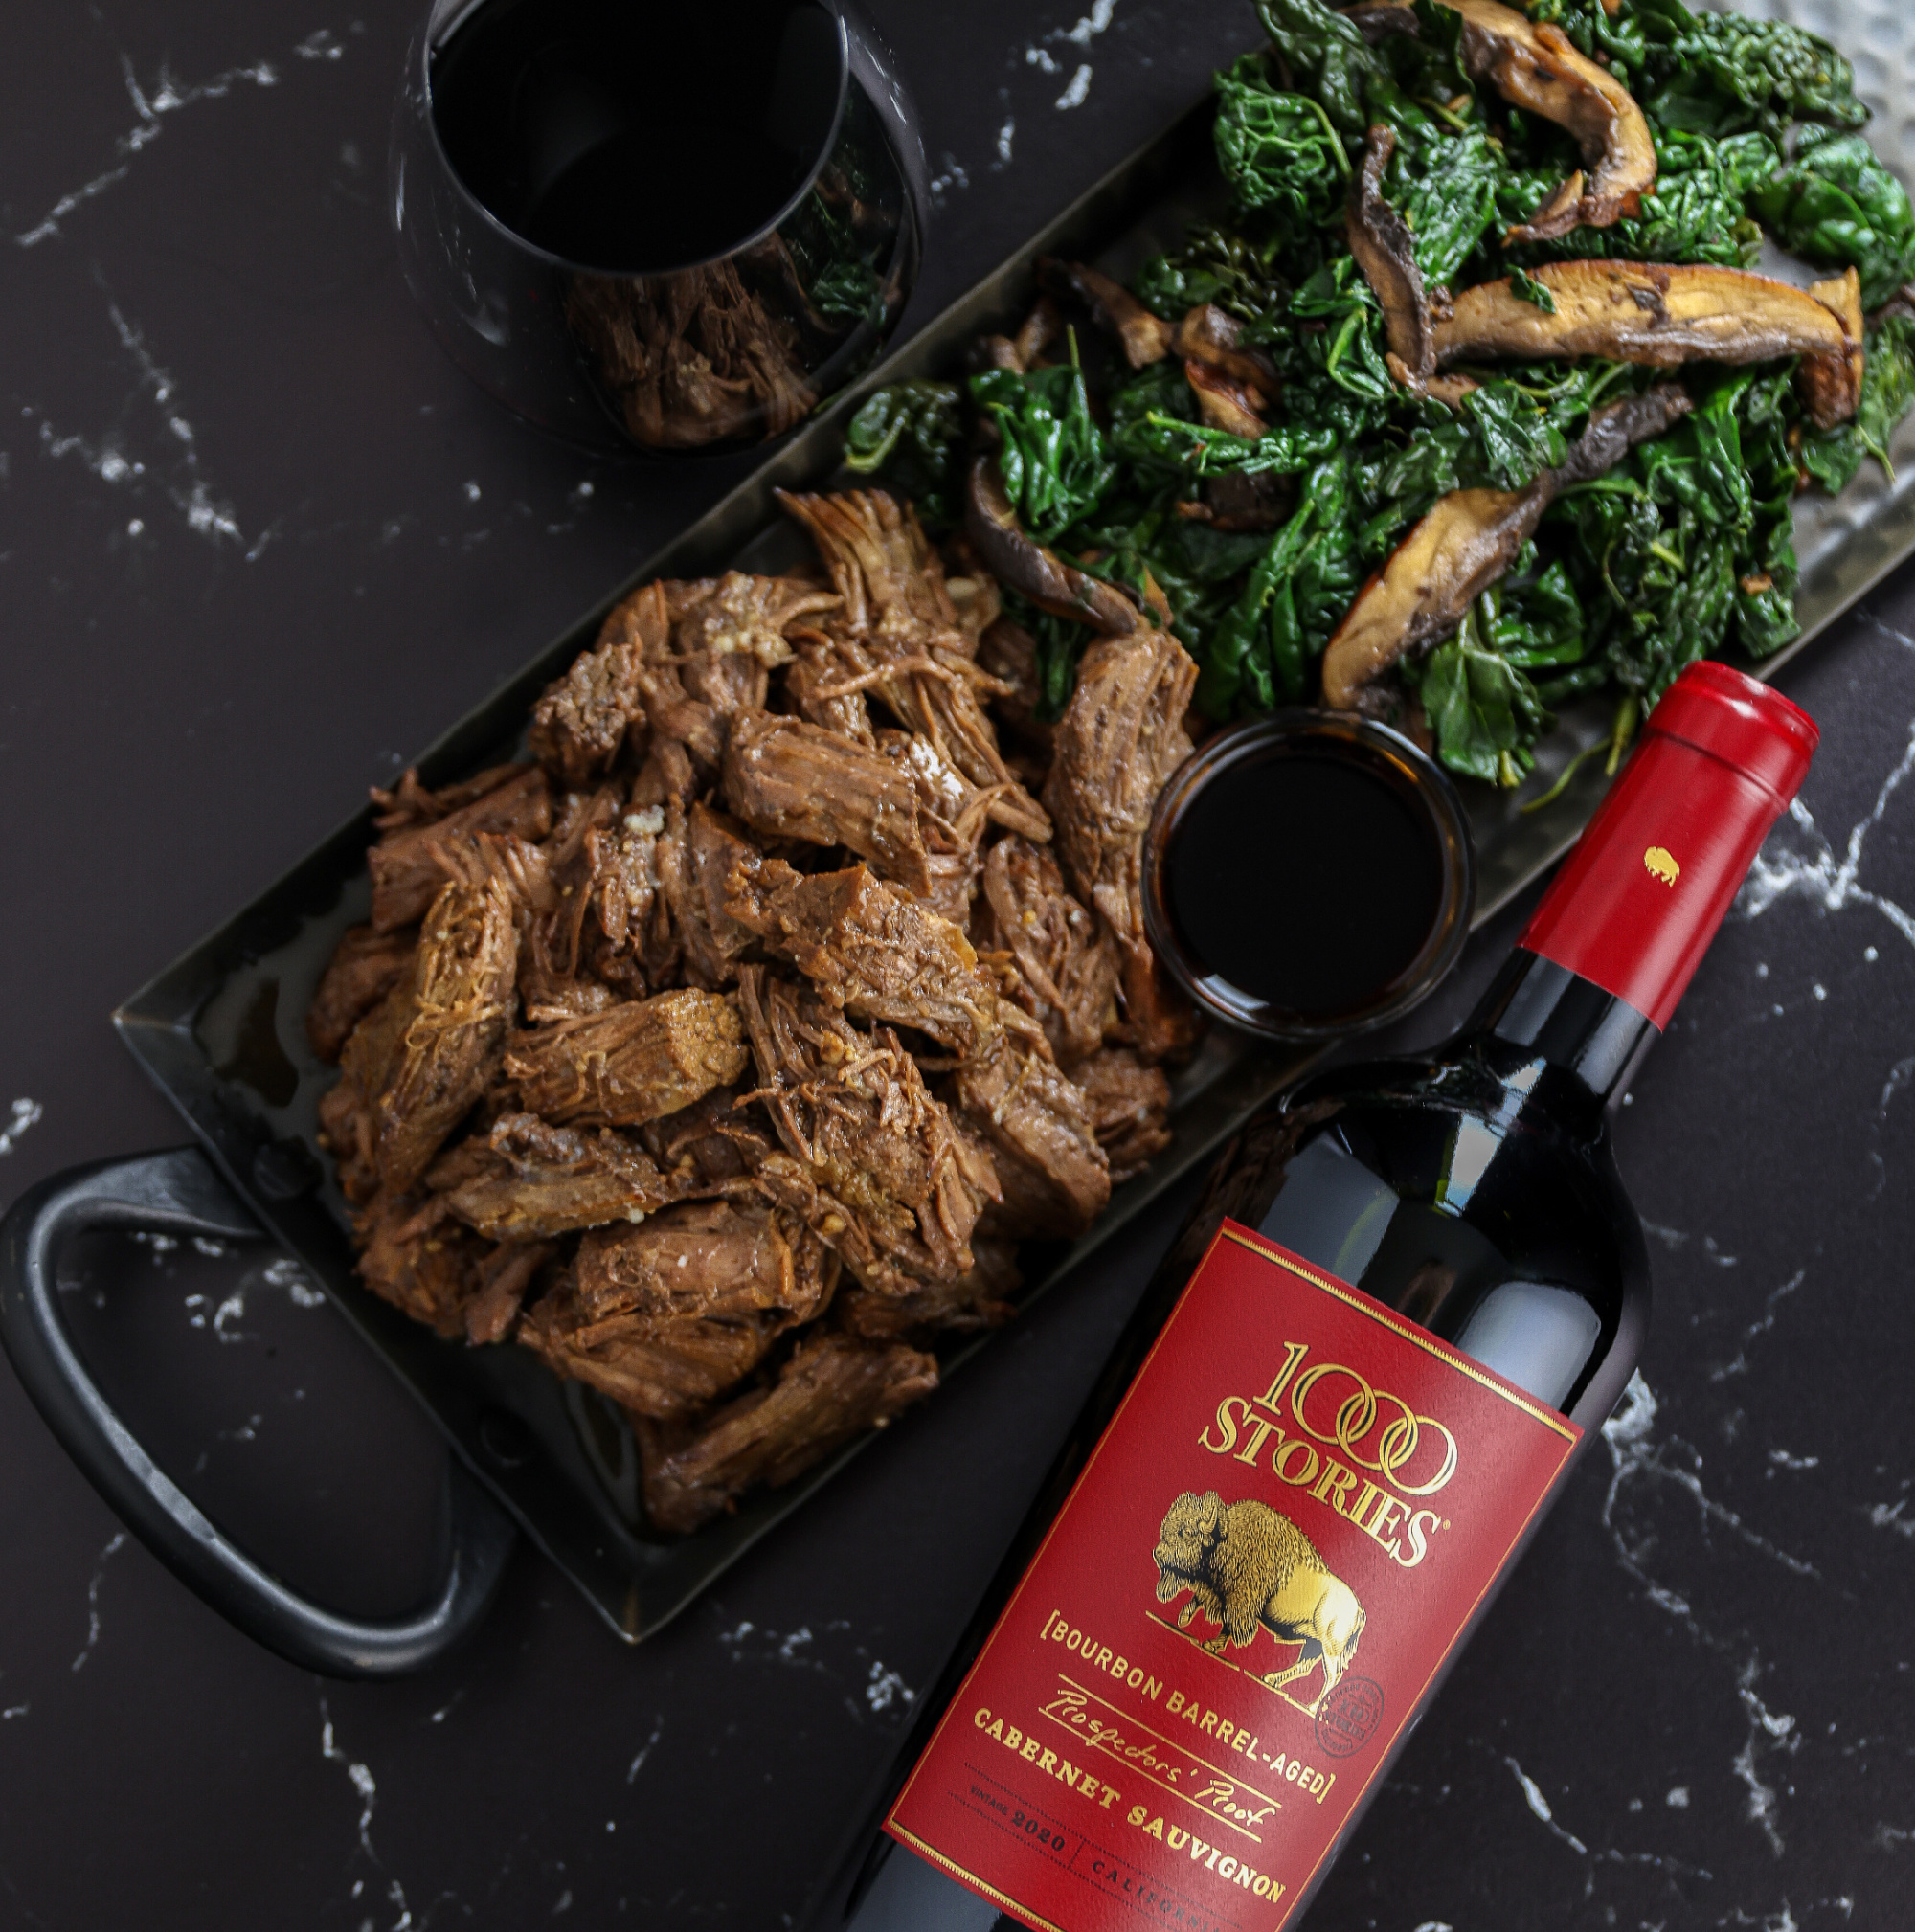
popping in to an impromptu happy hour. For best results, pair with our Prospector’s Proof
Cabernet Sauvignon. Enjoy!

Slow Cooker Balsamic Roast Beef

Serves 6

Ingredients:

  • 2 lbs. boneless beef chuck roast
  • 1 cup chicken broth
  • 1/3 cup balsamic vinegar
  • 2 tablespoons tamari
  • 2 tablespoon maple syrup
  • 3 cloves of garlic, minced
  • 2 teaspoons coconut oil
  • 1/2 cup yellow onion, diced
  • 2 portobello mushroom caps, sliced lengthwise
  • 4 cups kale leaves, chopped
  • 2 teaspoons apple cider vinegar
  • Sea Salt & Black Pepper, to taste

Directions:

  1. Place roast in the slow cooker. In a bowl, mix together the chicken broth, balsamic vinegar,tamari, maple syrup and minced garlic. Mix well and pour over the roast beef. Cook on low for 6-8 hours. Baste the roast periodically.
  2. Before serving, heat coconut oil in a large skillet over medium heat. Add diced onion and mushrooms and sauté for 3 to 5 minutes or until softened. Add in the kale leaves and continue to sauté just until wilted. Turn off the heat, stir in the apple cider vinegar and season with salt and black pepper to taste.
  3. Once roast is cooked through and you are ready to eat, remove it from the slow cooker into a large mixing bowl. Trim off any large pieces of fat and shred with two forks. Put it back into the slow cooker and let it soak in the juices for 5 to 10 minutes. When ready to eat, use a slotted spoon to lift the beef out of the slow cooker onto a plate. Transfer the leftover juices into a jar to use as gravy or for a future roast.
  4. Plate roast beef with a side of sauteed kale and mushrooms. Enjoy!

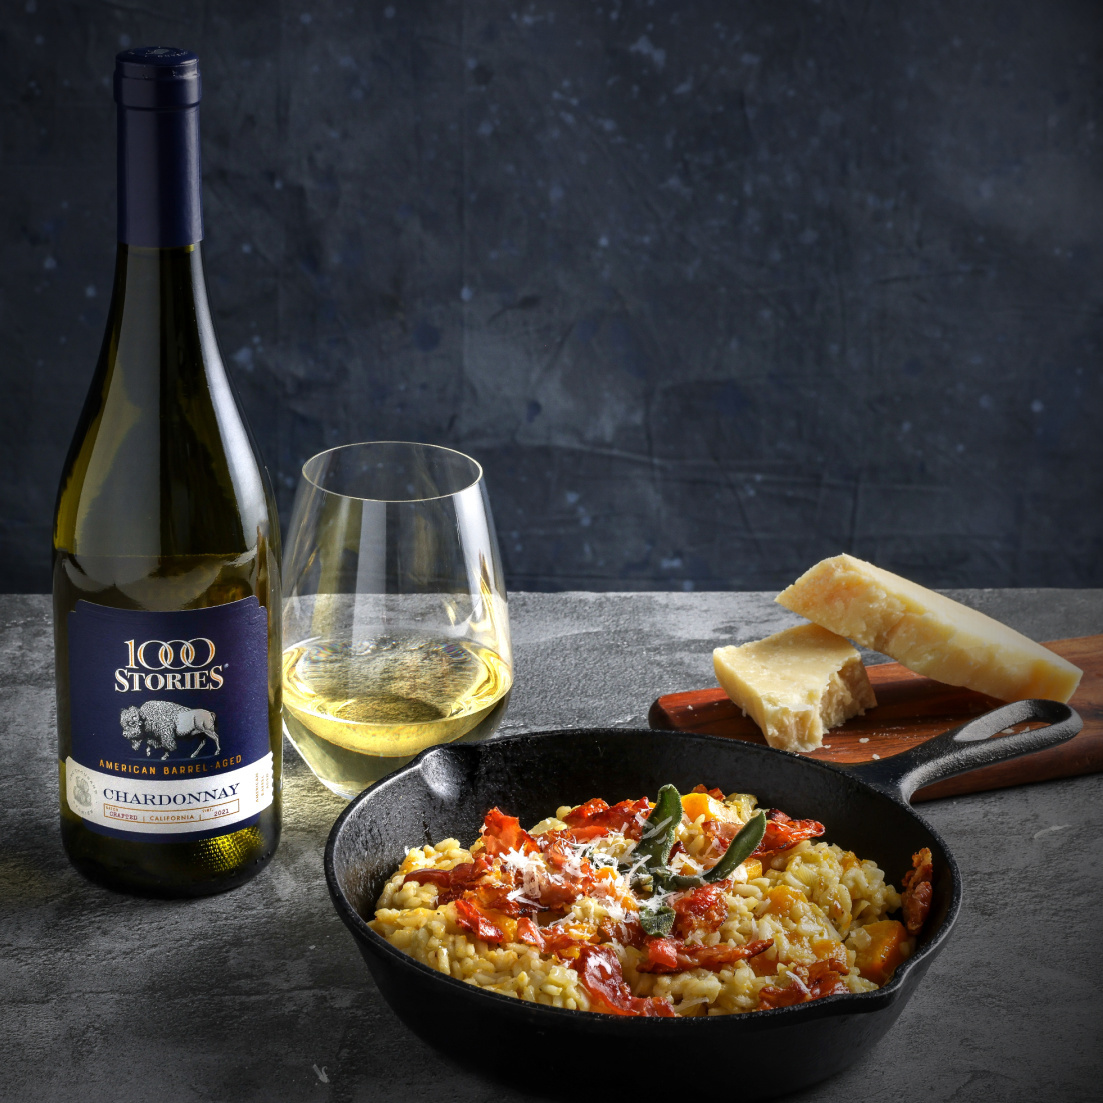
Butternut Squash Risotto with crispy prosciutto

Published On - November 3, 2022

By Amy TesconiAmy Tesconi

We have two words for your Friendsgiving guests: Crispy Prosciutto.

This holiday season we are embracing the unexpected and putting our own spin on traditional side dishes, and traditional Chardonnay. Imagine a creamy fall risotto, topped with salty, crisp prosciutto and fresh herbs and paired with our newly-released Chardonnay, aged in American oak barrels, a new bold take on a California classic.

This recipe is perfect for a dinner party in, but it also travels well, an excellent solution when you’ve been assigned a “side dish.” To transport, make or transfer risotto to a dutch oven or casserole dish with lid that can be reheated at your destination. Keep crispy prosciutto and sage separate to add just before serving. Enjoy!

BUTTERNUT SQUASH RISOTTO WITH CRISPY PROSCIUTTO

Serves 8

ingredients:

  • 8 cups vegetable broth, low sodium
  • 2 tablespoons extra virgin olive oil
  • 1 yellow onion, diced
  • 4 cups butternut squash, peeled, seeds removed, cubed
  • 3 cloves of garlic, minced
  • 1 teaspoon sea salt, divided
  • 2 cups arborio rice
  • 1 cup Parmigiano Reggiano, finely grated
  • 4 1/4 ounces Prosciutto, sliced into small pieces
  • Fresh sage leaves
  • Salt/pepper to taste

directions:

  1. In a saucepan, bring the broth to a gentle simmer, then leave on low heat to keep warm.
  2. Meanwhile, heat the oil in a large pot over medium heat. Sauté the onions for five minutes. Stir in the squash, garlic, and half the salt. Cook for about six minutes, or until the edges begin to soften.
  3. Stir in the rice and remaining salt. Cook for two minutes, or until the rice is fragrant.
  4. Add the warm broth one cup at a time, stirring often and allowing time for the liquid to absorb before adding more. Cook until the risotto is al dente and the squash is tender, about 20 to 25 minutes.
  5. Meanwhile, in a small sauté pan, over medium heat, add the prosciutto. Cook for 5 to 7 minutes, until cooked through and slightly crispy. Remove and set aside.
  6. Add 1 teaspoon olive oil to the prosciutto pan and heat. Add the sage leaves and sprinkle with sea salt. Cook the sage leaves over medium-high heat until crispy and remove from pan.
  7. Before serving, stir in the parmesan and season with salt and pepper to taste.
  8. Divide into bowls, top with sage leaves and crispy prosciutto. Enjoy!

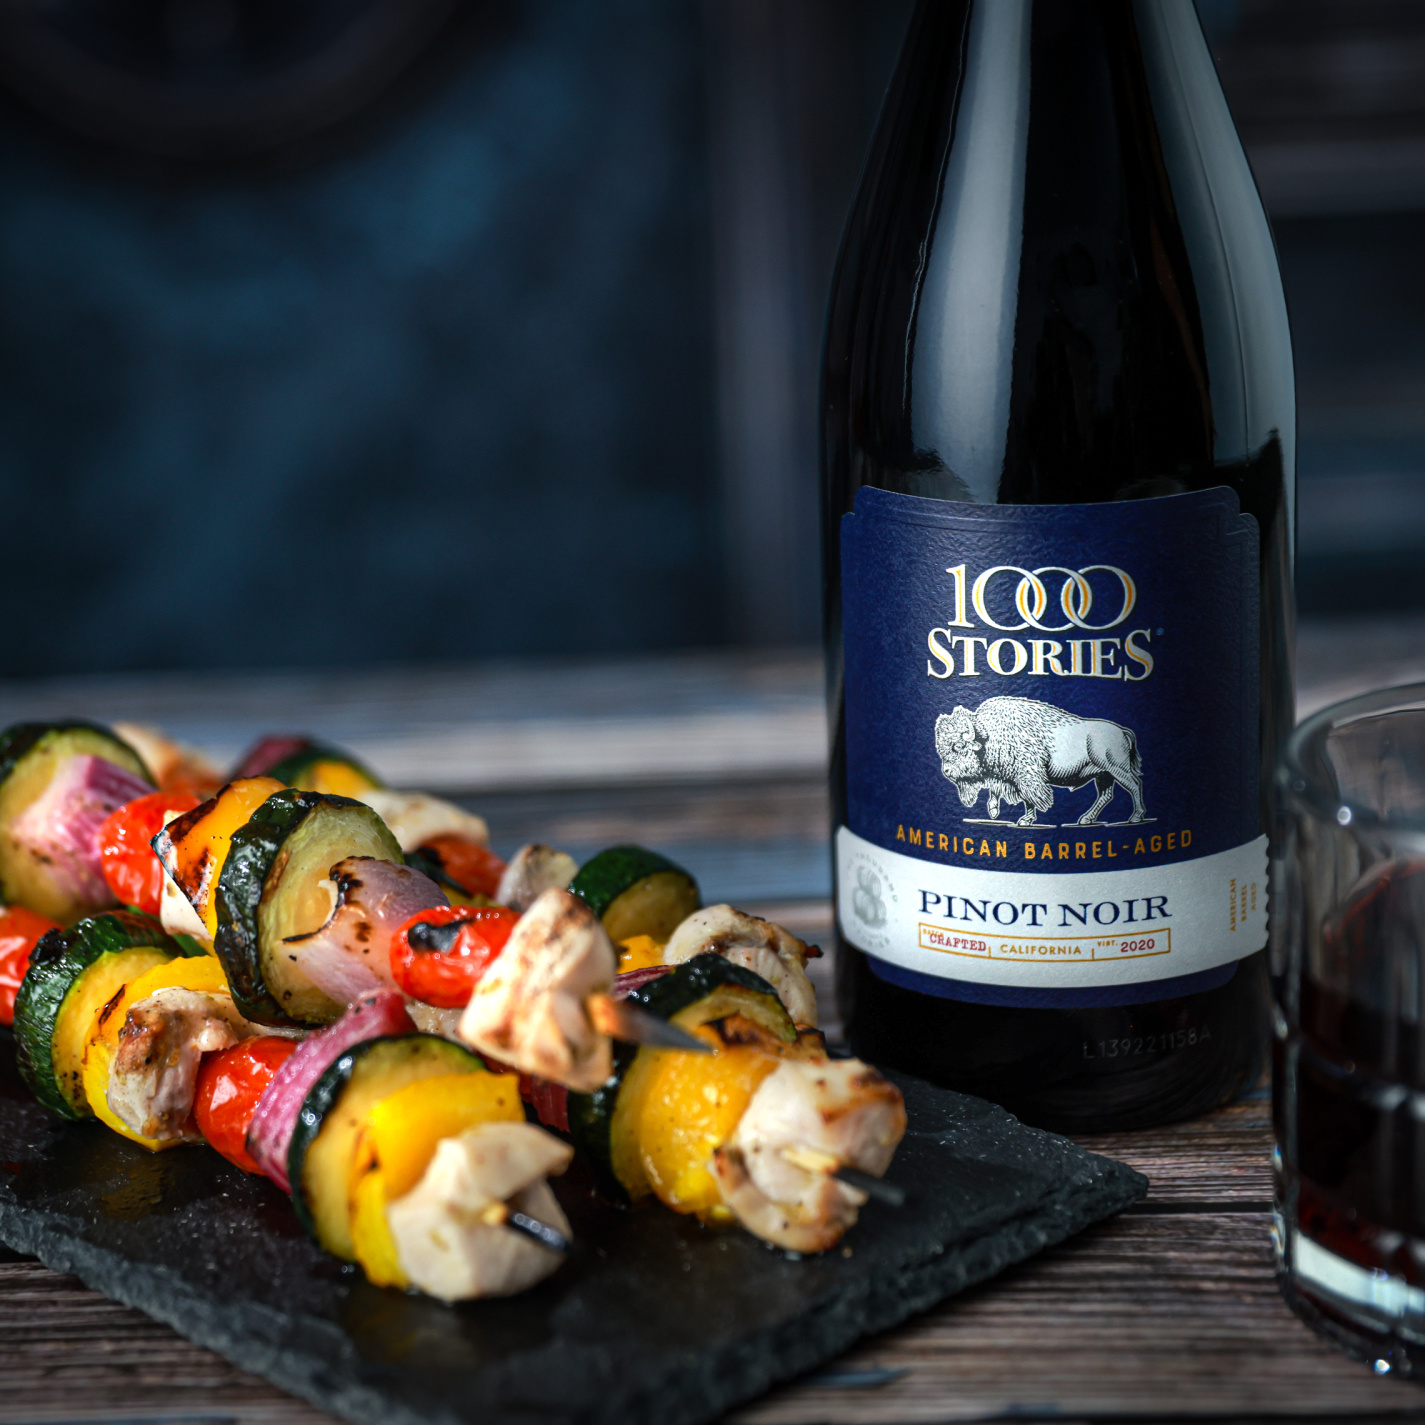
Grilled Chicken Kabobs

Published On - September 20, 2022

By Amy TesconiAmy Tesconi

What’s better than flavorful chicken and fresh veggies? Giving them a good char on the grill to bring out their boldest flavors. Today, we have a recipe for you that is both delicious and perfect for sharing at your fall gatherings. We recommend grabbing a bottle of our 2020 Pinot Noir to share alongside these sizzling kabobs.

Grilled Chicken Kabobs

Serves 4

Ingredients:

  • 1 lemon, juiced
  • 1 tablespoon red wine vinegar
  • 1 tablespoon dried oregano
  • 2 tablespoons extra virgin olive oil, divided
  • 1 lb chicken breast (boneless, skinless, diced into cubes)
  • 1 large zucchini
  • 1 yellow bell pepper
  • 1 cup red onion
  • 2 cups cherry tomatoes
  • 8 Barbecue Skewers
  • Salt/Pepper to taste

Directions:

  1. Combine the lemon juice, red wine vinegar, oregano and 1/2 of the olive oil in a mixing bowl. Add in the cubed chicken breast and mix well. Place in the fridge and let marinate while you prep the vegetables.
  2. Dice the zucchini, yellow bell pepper, and red onion into large chunks. Toss in the remaining olive oil.
  3. Slide the marinated cubed chicken, zucchini, yellow bell pepper, red onion and cherry tomatoes onto the skewers.
  4. Preheat the grill to medium heat.
  5. Grill the kabobs for 8 to 10 minutes per side or until chicken is cooked through.
  6. Remove the kabobs from the grill and divide onto plates. Enjoy!

Recipe Notes:

Leftovers: Store covered in an airtight container in the fridge up to three days.
Serving Size: One serving is equal to approximately two kabobs.
Serve Them With: Rice, quinoa, grilled potatoes and/or tzatziki sauce. Add to leafy greens to make a salad.
Vegan & Vegetarian: Omit the chicken and use marinated tofu or whole mushrooms instead.
Wooden Skewers: If grilling with wooden skewers, be sure to soak them in water before using to avoid them catching fire on the grill.

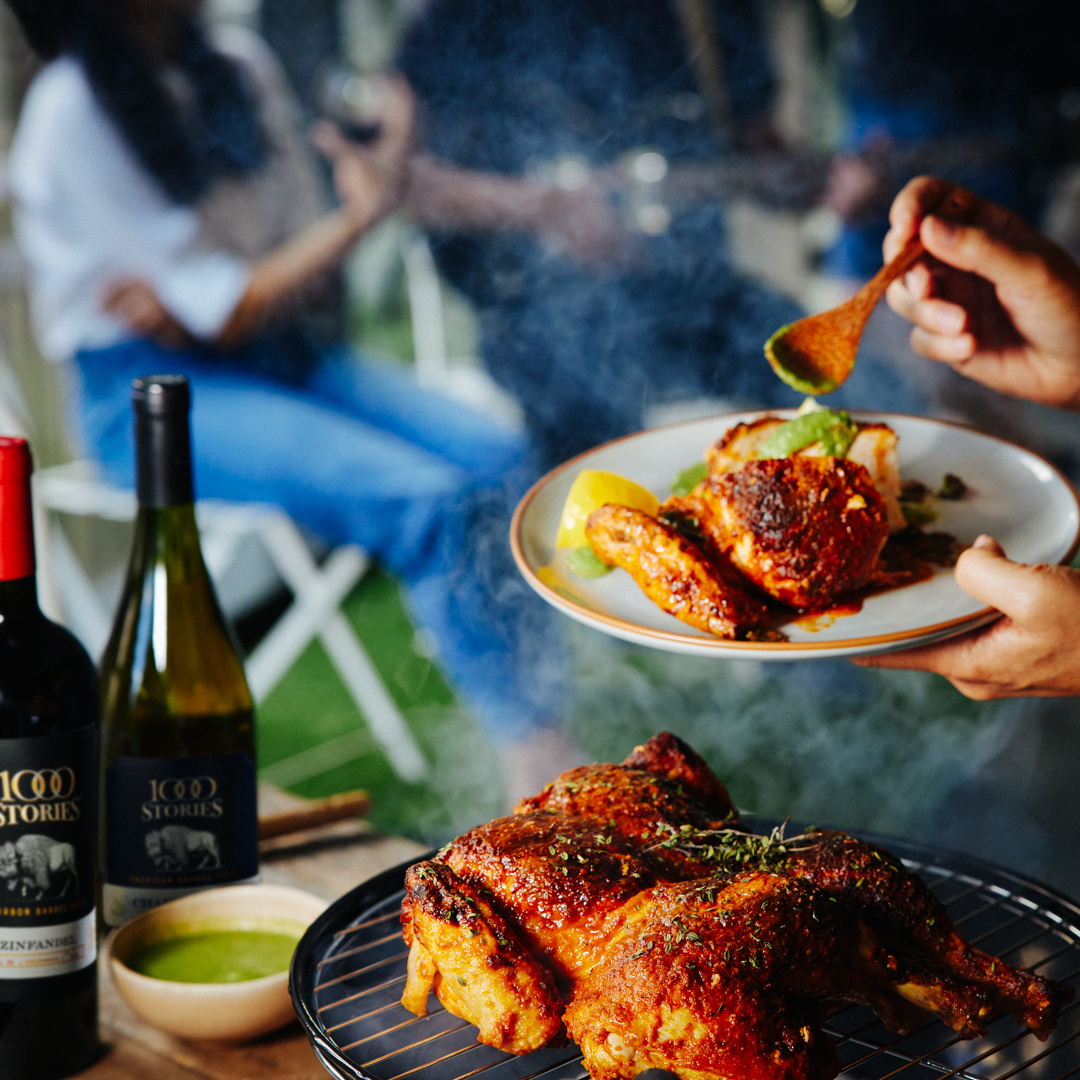
Whole Grilled Chicken

Published On - September 7, 2022

By Amy TesconiAmy Tesconi

Let’s just draw a line in the sand now and boldly state that there is no “grilling season.” Spring, summer, fall (winter?) you should get out and grill any time you crave the outdoors and the delicious, smokey flavors of freshly barbecued meats and veggies.

Exploring new ways to grill your favorite dishes is part of the experience.  Recently, we’ve been throwing a whole chicken on the grill and enjoying the juicy flavors alongside crispy, spicy skin. Grilling an entire chicken is easy, but there are tips and tricks to help you get the best result. Check out this basic grilled chicken recipe and our recommendations for getting it just right, then grab a bottle of American Barrel Aged Chardonnay and dinner al fresco is served!

Grilled Chicken:

The method for grilling a chicken is fairly simple: Light the grill (or coals), heat to approximately 400 degree F. Place the bird on the middle of the grill, skin-side up, close the lid and allow to cook for approximately 45 minutes to one hour (depending on size).  Then, check the bird every 5-10 minutes until done.

As they say, the devil is in the details. Below, a few tips:

Spatchcock – This is the method of butterflying (or flattening) the chicken before grilling. If you grill the chicken whole without flattening it, you may get some uneven cooking and dry out the breast. To do this, remove the backbone and then break the breastbone by pressing down on the legs. Some supermarkets sell whole chickens already spatchcocked, and a butcher can usually do this for you.

Oil! – The secret to crispy, delicious chicken skin is oiling it well. We recommend using an oil-based marinade or brushing on a generous amount of olive oil before cooking. You can also soak a paper towel in olive oil and then, using a pair of long metal tongs, brush it directly on the almost-ready grill before adding the chicken.

Go Bold – We’ve already mentioned the chicken skin in this dish, but it really is the star of the show. Your chicken will be even more flavorful if you add bold seasonings, rubs or sauces to the skin prior to cooking. You can add a spicy dry rub after brushing olive oil onto the skin, create a marinade and add a little liquid smoke, or brush on your favorite barbecue sauce a few minutes prior to removing from the grill. The bolder the better!

Use indirect heat – Juicy chicken takes time to roast, so you don’t want it placed directly over a heat source. If you have a gas grill, turn on all burners except the one directly under the bird. On a charcoal grill, you can either use a water bath in the center and arrange coals around it (this also helps keep the bird moist) or layer more coals on one side of the grill than the other, creating a “hot” side and a “cool” side. Place the chicken breast-down on the hot side first, removing after a few minutes and then place skin-side up on the cooler side to cook through.

A meat thermometer is always a good idea so you can check doneness without over-cooking.

All Ears

Published On - June 9, 2022

By Kyra MitchellKyra Mitchell

Warmer weather means that grill should be always preheated and ready to go. We love heading down to the farmer’s market to find some fresh seasonal veggies, bringing them home and giving them a good char. It’s the best way to enjoy the gold reaped from the garden.

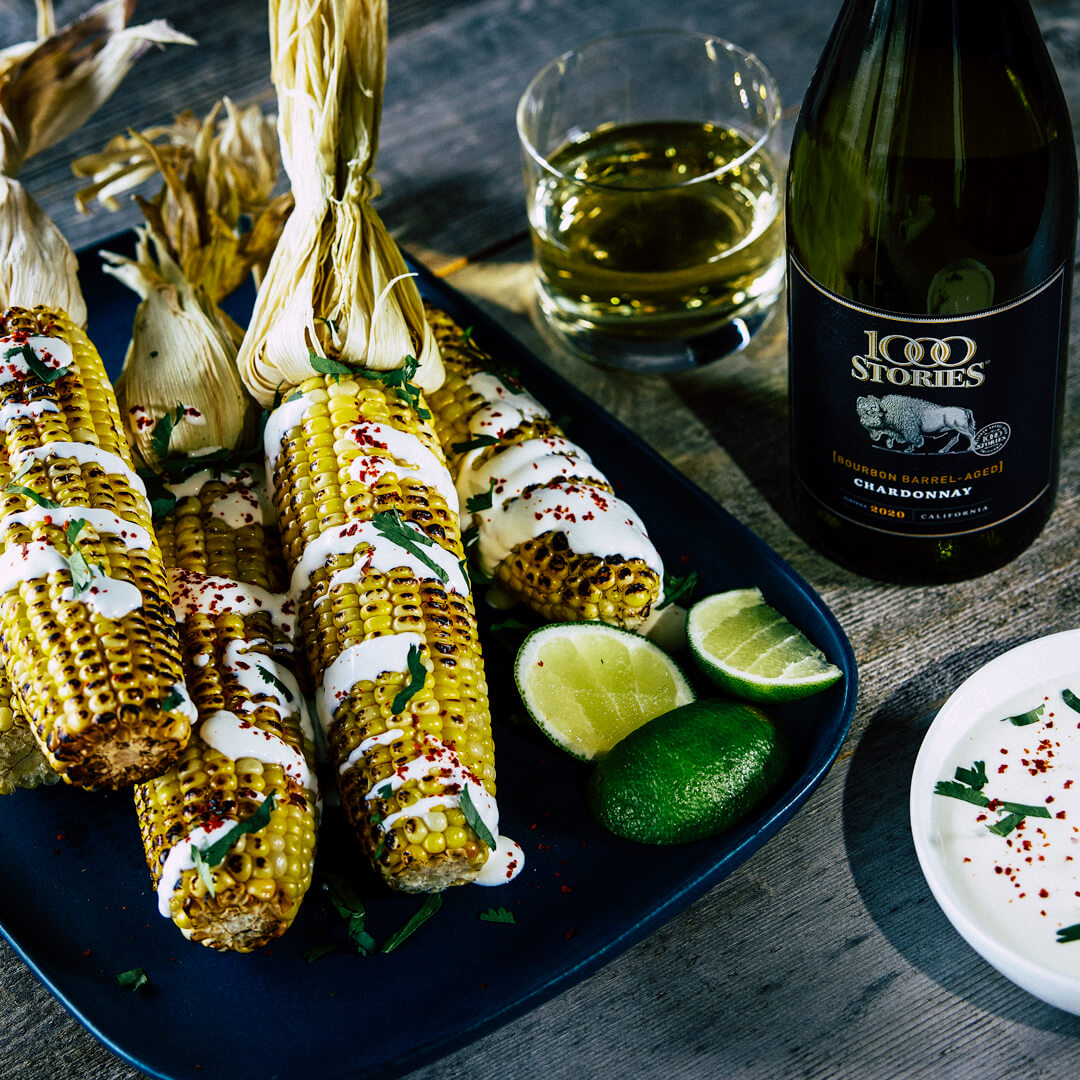
Today we recommend finding ripe ears of corn and preparing them in the Mexican street style. “Elote” as it’s called, is simply roasted corn on the cob with lime, cilantro and Mexican crema. The char of the grilled corn brings out the nuances of our bourbon barrel-aged wines.

We recommend pairing elote with a chilled bottle of our bourbon barrel-aged Chardonnay. The bright, bold flavors enhance the sweet, light and citrus of the Mexican street corn. This will become your next summer dinner staple, guaranteed.

Elotes Mexican style grilled corn and 1000 Stories Wines Chardonnay

INGREDIENTS

  • 6 to 8 medium ears sweet corn, husks removed
  • 1/2 cup Mexican crema, or sour cream
  • 1/2 cup mayonnaise
  • 1/2 cup chopped cilantro
  • 1 clove garlic, minced
  • 1/4 teaspoon ground chipotle pepper, to taste
  • 2 teaspoons finely grated lime zest, from 1 lime
  • 2 tablespoons lime juice, from 1 lime
  • 1/2 cup cotija cheese, crumbled
  • Lime wedges, to serve

INSTRUCTIONS

  1. Heat a gas or charcoal grill to 400F: Clean the grates once it has heated.
  2. Whisk together the sauce: In a bowl, whisk together the crema, mayonnaise, cilantro, garlic, chipotle pepper, lime zest and lime juice. Taste and season the mixture with salt if needed. (Crema has a little salt already, so add extra judiciously.) Set aside.
  3. Grill the corn: Place the husked corn directly onto grill grates. Grill the corn for about 3 minutes, undisturbed, or until kernels begin to turn golden brown and look charred. Turn over and repeat. When all sides are browned, remove from the grill onto a plate.
  4. Top the corn with sauce and cheese: Using a brush or a spoon, coat each ear of corn with the crema mixture. Sprinkle with crumbled cojita cheese. Sprinkle with additional chipotle pepper, if desired. Serve immediately with extra lime wedges.

See the full recipe at Simply Recipes.